飞牛nas硬盘风扇自动控制
1. 前言
此次由旧笔记本改成飞牛NAS 由于购买的硬盘盒不带风扇降温,硬盘一直过热。
大致构思:系统读取硬盘温度和CPU占用率,当满足条件(温度过高)外接小风扇启动。条件不满足时风扇停转。
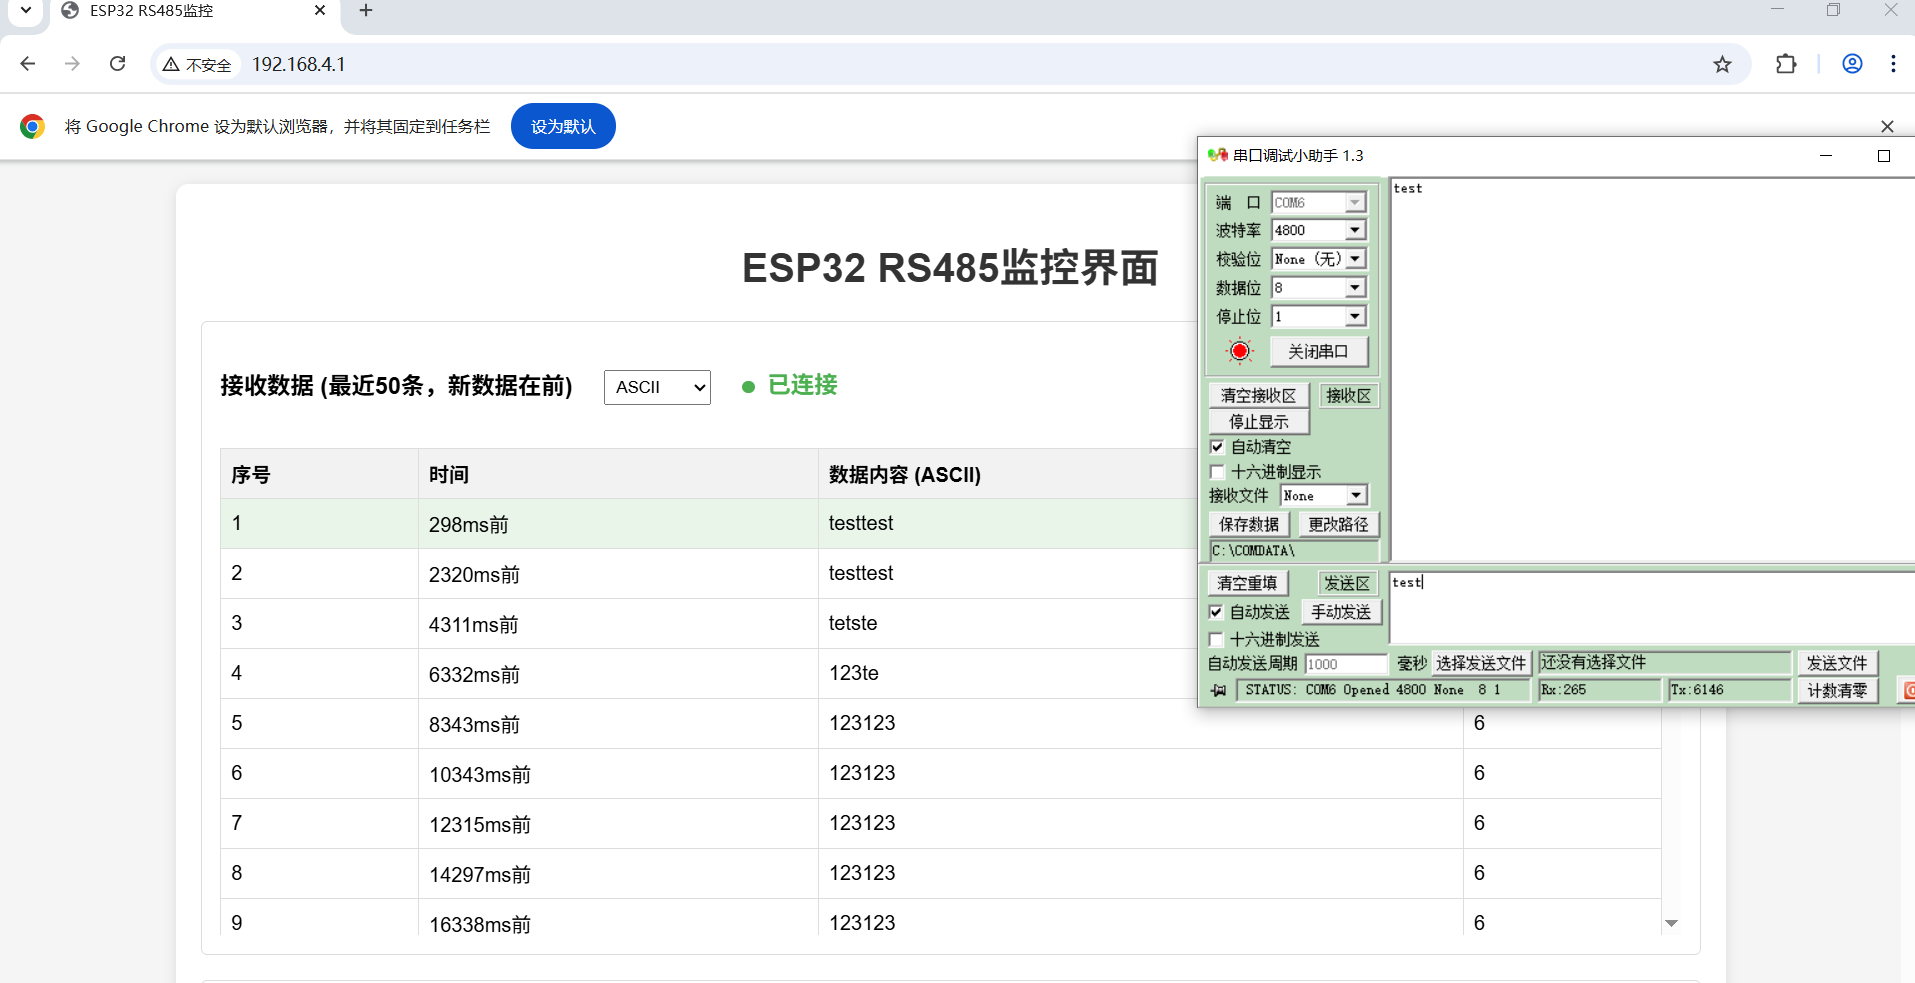
必要条件:由于有些硬盘盒不支持读取硬盘SMART信息。可以用命令sudo smartctl -i /dev/sdb 查看。输出中,查找“SMART support is:”这一行。如果显示为“Available – data is up to date”,则表示该硬盘支持SMART并且SMART数据是可用的。如果显示为“Not Supported”,则表示该硬盘不支持SMART。如下所示:
root@gladguang:~# sudo smartctl -i /dev/sdb
smartctl 7.3 2022-02-28 r5338 [x86_64-linux-6.6.38-trim] (local build)
Copyright (C) 2002-22, Bruce Allen, Christian Franke, www.smartmontools.org

=== START OF INFORMATION SECTION ===
Device Model:     WD4002FYYZ-01UL1B3   30
Serial Number:    PL1311234567XH
LU WWN Device Id: 5 000cca 22ec18301
Firmware Version: MPAOA3B0
User Capacity:    4,000,787,030,016 bytes [4.00 TB]
Sector Sizes:     512 bytes logical, 4096 bytes physical
Rotation Rate:    5700 rpm
Form Factor:      3.5 inches
Device is:        Not in smartctl database 7.3/5671
ATA Version is:   ATA8-ACS T13/1699-D revision 4
SATA Version is:  SATA 3.0, 6.0 Gb/s (current: 6.0 Gb/s)
Local Time is:    Wed Apr 30 12:52:15 2025 CST
SMART support is: Available - device has SMART capability.
SMART support is: Enabled
2. 硬件准备
- 淘宝USB小风扇

- 米家插排

-
热熔胶


3. 硬件连接
将扇热风扇用热熔胶固定在两侧。从左往右插座孔依次插上:电脑电源,硬盘盒电源,usb散热风扇。开启开关,散热风扇正常工作,硬盘温度29°。
4. 程序准备
1.硬盘温度读取
ssh连接飞牛,查询飞牛0.8.46版本基于Debian12系统。用 sudo smartctl -a /dev/sdb 命令查询硬盘SMART所有信息。其中id194 Temperature_Celsius的RAW_VALUE就是现在硬盘温度。
root@gladguang:~# lsb_release -a #查询系统版本
No LSB modules are available.
Distributor ID: Debian
Description:    Debian GNU/Linux 12 (bookworm)
Release:        12
Codename:       bookworm
root@gladguang:~# lsblk -dnlo name,type #列出所有磁盘。sda为系统盘固态盘,sdb sdc为硬盘盒外接硬盘,sr0为光驱。
sda  disk
sdb  disk
sdc  disk
sr0  rom
root@gladguang:~# smartctl -a /dev/sdb #查询硬盘信息
smartctl 7.3 2022-02-28 r5338 [x86_64-linux-6.6.38-trim] (local build)
Copyright (C) 2002-22, Bruce Allen, Christian Franke, www.smartmontools.org

=== START OF INFORMATION SECTION ===
Device Model:     WD4002FYYZ-01UL1B3   30
Serial Number:    PL1311LAG3A2XH
LU WWN Device Id: 5 000cca 22ec18301
Firmware Version: MPAOA3B0
User Capacity:    4,000,787,030,016 bytes [4.00 TB]
Sector Sizes:     512 bytes logical, 4096 bytes physical
Rotation Rate:    5700 rpm
Form Factor:      3.5 inches
Device is:        Not in smartctl database 7.3/5671
ATA Version is:   ATA8-ACS T13/1699-D revision 4
SATA Version is:  SATA 3.0, 6.0 Gb/s (current: 6.0 Gb/s)
Local Time is:    Wed Apr 30 12:31:23 2025 CST
SMART support is: Available - device has SMART capability.
SMART support is: Enabled

=== START OF READ SMART DATA SECTION ===
SMART Status not supported: Incomplete response, ATA output registers missing
SMART overall-health self-assessment test result: PASSED
Warning: This result is based on an Attribute check.

General SMART Values:
Offline data collection status:  (0x84) Offline data collection activity
                                        was suspended by an interrupting command from host.
                                        Auto Offline Data Collection: Enabled.
Self-test execution status:      (   0) The previous self-test routine completed
                                        without error or no self-test has ever
                                        been run.
Total time to complete Offline
data collection:                (43214) seconds.
Offline data collection
capabilities:                    (0x5b) SMART execute Offline immediate.
                                        Auto Offline data collection on/off support.
                                        Suspend Offline collection upon new
                                        command.
                                        Offline surface scan supported.
                                        Self-test supported.
                                        No Conveyance Self-test supported.
                                        Selective Self-test supported.
SMART capabilities:            (0x0003) Saves SMART data before entering
                                        power-saving mode.
                                        Supports SMART auto save timer.
Error logging capability:        (0x01) Error logging supported.
                                        General Purpose Logging supported.
Short self-test routine
recommended polling time:        (   1) minutes.
Extended self-test routine
recommended polling time:        ( 721) minutes.
SCT capabilities:              (0x003d) SCT Status supported.
                                        SCT Error Recovery Control supported.
                                        SCT Feature Control supported.
                                        SCT Data Table supported.

SMART Attributes Data Structure revision number: 16
Vendor Specific SMART Attributes with Thresholds:
ID# ATTRIBUTE_NAME          FLAG     VALUE WORST THRESH TYPE      UPDATED  WHEN_FAILED RAW_VALUE
  1 Raw_Read_Error_Rate     0x000b   100   100   016    Pre-fail  Always       -       0
  2 Throughput_Performance  0x0005   135   135   054    Pre-fail  Offline      -       99
  3 Spin_Up_Time            0x0007   153   153   024    Pre-fail  Always       -       486 (Average 427)
  4 Start_Stop_Count        0x0012   100   100   000    Old_age   Always       -       64
  5 Reallocated_Sector_Ct   0x0033   100   100   005    Pre-fail  Always       -       0
  7 Seek_Error_Rate         0x000b   100   100   067    Pre-fail  Always       -       0
  8 Seek_Time_Performance   0x0005   113   113   020    Pre-fail  Offline      -       42
  9 Power_On_Hours          0x0012   100   100   000    Old_age   Always       -       4285
 10 Spin_Retry_Count        0x0013   100   100   060    Pre-fail  Always       -       0
 12 Power_Cycle_Count       0x0032   100   100   000    Old_age   Always       -       25
192 Power-Off_Retract_Count 0x0032   100   100   000    Old_age   Always       -       134
193 Load_Cycle_Count        0x0012   100   100   000    Old_age   Always       -       134
194 Temperature_Celsius     0x0002   193   193   000    Old_age   Always       -       31 (Min/Max 18/50)
196 Reallocated_Event_Count 0x0032   100   100   000    Old_age   Always       -       0
197 Current_Pending_Sector  0x0022   100   100   000    Old_age   Always       -       0
198 Offline_Uncorrectable   0x0008   100   100   000    Old_age   Offline      -       0
199 UDMA_CRC_Error_Count    0x000a   200   200   000    Old_age   Always       -       0

SMART Error Log Version: 1
No Errors Logged

SMART Self-test log structure revision number 1
Num  Test_Description    Status                  Remaining  LifeTime(hours)  LBA_of_first_error
# 1  Extended offline    Completed without error       00%      4066         -
# 2  Extended offline    Aborted by host               90%      2615         -

SMART Selective self-test log data structure revision number 1
 SPAN  MIN_LBA  MAX_LBA  CURRENT_TEST_STATUS
    1        0        0  Not_testing
    2        0        0  Not_testing
    3        0        0  Not_testing
    4        0        0  Not_testing
    5        0        0  Not_testing
Selective self-test flags (0x0):
  After scanning selected spans, do NOT read-scan remainder of disk.
If Selective self-test is pending on power-up, resume after 0 minute delay.
安装必要程序和库:
sudo apt install smartctl
pip3 install subprocess shutil
新建python文件命名为hard_disk_temperature_checker.py
# -*- coding: utf-8 -*-
"""
bash的查询命令lsblk -dnlo name,type 查询电脑上所有磁盘。sudo smartctl -a /dev/sdb查询硬盘SMART信息
subprocess 模块,用于创建新的进程,执行外部命令并与其进行交互
shutil 模块,提供了一些高级的文件和目录操作功能,这里用于检查系统中是否安装了指定的命令

作者:gladgaung
日期:2025-4-30
"""

import subprocess
import shutil

# 定义一个名为 HardDiskTemperatureChecker 的类,用于检查硬盘的温度
class HardDiskTemperatureChecker:
    def __init__(self, password):
        # 类的构造函数,接收一个密码作为参数
        # 将传入的密码存储在类的实例属性 self.password 中,以便后续执行 sudo 命令时使用
        self.password = password

    def check_smartctl_installed(self):
        # 检查系统中是否安装了 smartctl 命令
        if shutil.which('smartctl') is None:
            # 如果 smartctl 命令未安装,打印提示信息
            print("smartctl 未安装,正在尝试安装...")
            try:
                # 构造安装 smartmontools 包的命令,使用 echo 命令将密码传递给 sudo 命令
                # 先更新软件包列表,然后安装 smartmontools 包
                install_command = f'echo {self.password} | sudo -S apt update && echo {self.password} | sudo -S apt install -y smartmontools'
                # 执行安装命令,并捕获命令的输出和返回码
                result = subprocess.run(install_command, shell=True, capture_output=True, text=True)
                if result.returncode == 0:
                    # 如果命令执行成功,打印安装成功的信息,并返回 True
                    print("smartctl 安装成功。")
                    return True
                else:
                    # 如果命令执行失败,打印安装失败的信息,并返回 False
                    print(f"smartctl 安装失败: {result.stderr}")
                    return False
            except Exception as e:
                # 捕获安装过程中可能出现的异常,打印异常信息,并返回 False
                print(f"安装过程中发生错误: {e}")
                return False
        # 如果 smartctl 命令已安装,直接返回 True
        return True

    def get_all_disks(self):
        try:
            # 执行 lsblk 命令,获取所有硬盘设备的信息
            # -dnlo 选项分别表示不显示子设备、不显示标题、只输出指定列
            # name,type 表示只输出设备名称和设备类型
            result = subprocess.run(['lsblk', '-dnlo', 'name,type'], capture_output=True, text=True)
            if result.returncode == 0:
                # 如果命令执行成功,将输出按行分割成列表
                lines = result.stdout.strip().splitlines()
                # 初始化一个空列表,用于存储所有硬盘设备的路径
                disks = []
                for line in lines:
                    # 对每一行输出进行分割,得到设备名称和设备类型
                    parts = line.split()
                    if len(parts) == 2 and parts[1] == 'disk':
                        # 如果分割后的部分长度为 2 且设备类型为 disk
                        # 将设备名称添加到 /dev/ 前缀后,添加到 disks 列表中
                        disks.append(f'/dev/{parts[0]}')
                # 返回包含所有硬盘设备路径的列表
                return disks
            else:
                # 如果命令执行失败,打印获取硬盘设备列表失败的信息,并输出错误信息
                print(f"获取硬盘设备列表失败: {result.stderr}")
        except Exception as e:
            # 捕获执行过程中可能出现的异常,打印异常信息
            print(f"发生错误: {e}")
        # 如果出现异常或命令执行失败,返回空列表
        return []

    def get_hard_disk_temperature(self, device):
        # 检查 smartctl 命令是否安装,如果未安装则尝试安装
        if not self.check_smartctl_installed():
            # 如果安装失败,打印提示信息,并返回 None
            print("无法安装 smartctl,请手动安装 smartmontools。")
            return None
        try:
            # 执行 smartctl 命令,获取指定硬盘设备的详细信息
            # -S 选项用于指定输入密码的方式,-a 选项表示显示所有信息
            process = subprocess.Popen(['sudo', '-S', 'smartctl', '-a', device], stdin=subprocess.PIPE, stdout=subprocess.PIPE, stderr=subprocess.PIPE, text=True)
            # 向进程的标准输入传递密码,并获取命令的输出和错误信息
            stdout, stderr = process.communicate(input=self.password + '\n')
            if process.returncode == 0:
                # 如果命令执行成功,将输出按行分割成列表
                lines = stdout.splitlines()
                for line in lines:
                    # 遍历每一行输出,查找包含 Temperature_Celsius 的行
                    if "Temperature_Celsius" in line:
                        # 对包含 Temperature_Celsius 的行进行分割
                        parts = line.split()
                        # 尝试从分割后的列表中提取温度值,温度值通常在第 10 个位置
                        temperature = parts[9] if len(parts) > 9 else None
                        if temperature:
                            # 如果成功提取到温度值,返回该温度值
                            return temperature
                # 如果未找到温度信息,打印提示信息
                print(f"未找到 {device} 硬盘温度信息。")
            else:
                # 如果命令执行失败,打印查询硬盘温度命令执行失败的信息,并输出错误信息
                print(f"查询 {device} 硬盘温度命令执行失败: {stderr}")
        except Exception as e:
            # 捕获执行过程中可能出现的异常,打印异常信息
            print(f"查询 {device} 硬盘温度时发生错误: {e}")
        # 如果出现异常或未找到温度信息,返回 None
        return None

    def check_all_disks_temperature(self):
        # 调用 get_all_disks 方法,获取所有硬盘设备的路径
        disks = self.get_all_disks()
        # 初始化一个空字典,用于存储每个硬盘设备的温度信息
        temperature_dict = {}
        for disk in disks:
            # 遍历每个硬盘设备,调用 get_hard_disk_temperature 方法获取其温度
            temperature = self.get_hard_disk_temperature(disk)
            if temperature:
                # 如果成功获取到温度信息,将硬盘设备路径和温度信息添加到字典中
 # temperature_dict = {'/dev/sda':'0', '/dev/sdb':'29', '/dev/sdc':'29'}
新建一个测试文件:test.py
# -*- coding: utf-8 -*-
"""
作者:gladgaung
日期:2025-4-30
"""

from hard_disk_temperature_checker import HardDiskTemperatureChecker as DiskTemp

if __name__ == "__main__":
    # 定义一个变量 password,用于存储访问硬盘温度检查功能所需的密码
    # 注意:这里的密码需要替换为你飞牛NAS实际使用的密码
    password = "password"
    # 创建一个 DiskTemp 类的实例 checker,并将密码作为参数传递给该实例的构造函数
    # 这个实例将用于检查硬盘的温度
    checker = DiskTemp(password)
    # 调用 checker 实例的 check_all_disks_temperature 方法,该方法会检查所有硬盘的温度
    # 并将检查结果存储在一个字典中,字典的键可能是硬盘的标识,值是对应的温度
    temperature_dict = checker.check_all_disks_temperature()
    # 打印存储硬盘温度信息的字典,方便查看检查结果
    print(temperature_dict)
执行 python3 test.py 结果:
{'/dev/sda':'0', '/dev/sdb':'29', '/dev/sdc':'29'}
测试成功,读取硬盘温度模块完成。接下来就可以找一下如何操作插座。
2. 插座自动控制
插座配网
- 按说明书连接wifi后接入米家。查看是否可以远程控制插座。

米家设备token获取
尝试过很多方法包括:python-miio 的moiocli discover,miiocli cloud等命令,均不行。最后安装Home Assistant在配置文件找到。
以飞牛nas为例,在应用商店里有程序,点击安装。安装完后进入页面,会有引导页面,按步骤设置账号密码。完毕后推出,并停止应用。
在GitHub按照readme步骤进行[Home Assistant 米家集成](ha_xiaomi_home/doc/README_zh.md at main · XiaoMi/ha_xiaomi_home (github.com)) 我是按步骤三进行文件手动安装。下载链接为:Releases · XiaoMi/ha_xiaomi_home
下载后解压文件,在飞牛nas :文件管理——应用文件——home-assistant——config目录下新建文件夹custom_components然后把下载好的xiaomi_home整个目录上传。剩下的按照[Home Assistant 米家集成](ha_xiaomi_home/doc/README_zh.md at main · XiaoMi/ha_xiaomi_home (github.com)) 步骤进行。
完成后在应用文件夹下home-assistantan/config/.storage/xiaomi_home/miot_config/文件加下有个 891047768_cn.dict的 .dict文件,下载下来以txt文本形式打开,就可以找到插座的token。
好像Home Assistan就可以用MQTT来控制。算了不管了,继续本地控制。
过程各种问题:
创建数据库和表跟字段
数据库连接:connect_to_db 函数用于建立与 MySQL 数据库的连接。
记录插入:insert_action_record、insert_sdb_temperature 和 insert_sdc_temperature 函数分别用于将操作记录、sdb 温度记录和 sdc 温度记录插入到相应的数据库表中。
循环检测:使用 while True 循环每分钟检查一次 sdb 和 sdc 的温度。
温度判断:当 sdb 或 sdc 的温度大于 35 度且持续时间超过 10 分钟时,启动设备;当 sdb 和 sdc 的温度都小于 30 度时,关闭设备。
时间处理:使用 time.time() 函数来记录高温开始时间,并计算持续时间。

-- 创建操作记录表格
CREATE TABLE IF NOT EXISTS action_records (
    id INT AUTO_INCREMENT PRIMARY KEY,
    disk VARCHAR(10),
    action VARCHAR(10),
    temperature INT,
    timestamp DATETIME
);

-- 创建 sdb 温度记录表格
CREATE TABLE IF NOT EXISTS sdb_temperatures (
    id INT AUTO_INCREMENT PRIMARY KEY,
    temperature INT,
    timestamp DATETIME
);

-- 创建 sdc 温度记录表格
CREATE TABLE IF NOT EXISTS sdc_temperatures (
    id INT AUTO_INCREMENT PRIMARY KEY,
    temperature INT,
    timestamp DATETIME
);
-- 创建 logs 表
CREATE TABLE IF NOT EXISTS logs (
    id INT AUTO_INCREMENT PRIMARY KEY,
    timestamp VARCHAR(255) NOT NULL,
    app VARCHAR(255) NOT NULL,
    level VARCHAR(255) NOT NULL,
    content TEXT NOT NULL
);
最终程序
# -*- coding: utf-8 -*-
"""
作者:gladgaung
日期:2025-4-30
版本:12.0
"""

# 导入必要的模块
import time
import mysql.connector
from miio import Device
import subprocess
import shutil
import logging
from logging.handlers import TimedRotatingFileHandler
import os
from datetime import datetime, timedelta
import re

# 配置日志
# 创建一个根日志记录器,用于记录程序运行过程中的各种信息
root_logger = logging.getLogger()
# 设置根日志记录器的日志级别为 INFO,只记录 INFO 及以上级别的日志
root_logger.setLevel(logging.INFO)

# 创建一个格式化器,用于定义日志的输出格式
formatter = logging.Formatter('%(asctime)s - %(name)s - %(levelname)s - %(message)s')

# 创建一个控制台处理器,将日志信息输出到控制台
console_handler = logging.StreamHandler()
# 设置控制台处理器的日志级别为 INFO
console_handler.setLevel(logging.INFO)
# 为控制台处理器设置日志格式
console_handler.setFormatter(formatter)
# 将控制台处理器添加到根日志记录器中
root_logger.addHandler(console_handler)

# 创建日志文件夹,用于存储日志文件
log_folder = './log'
# 检查日志文件夹是否存在,如果不存在则创建
if not os.path.exists(log_folder):
    os.makedirs(log_folder)

# 创建一个按时间轮转的文件处理器,每天午夜生成一个新的日志文件
# backupCount=7 表示最多保留 7 个旧的日志文件
file_handler = TimedRotatingFileHandler(os.path.join(log_folder, 'app.log'), when='midnight', interval=1, backupCount=7)
# 设置文件处理器的日志级别为 INFO
file_handler.setLevel(logging.INFO)
# 为文件处理器设置日志格式
file_handler.setFormatter(formatter)
# 将文件处理器添加到根日志记录器中
root_logger.addHandler(file_handler)

# 创建数据库和应用的日志记录器,分别用于记录数据库操作和应用程序的日志
db_logger = logging.getLogger('database')
app_logger = logging.getLogger('app')


# 定义一个名为 HardDiskTemperatureChecker 的类,用于检查硬盘的温度
class HardDiskTemperatureChecker:
    def __init__(self, password):
        # 类的构造函数,接收一个密码作为参数
        # 将传入的密码存储在类的实例属性 self.password 中,以便后续执行 sudo 命令时使用
        self.password = password

    def check_smartctl_installed(self):
        # 检查系统中是否安装了 smartctl 命令
        if shutil.which('smartctl') is None:
            # 如果 smartctl 命令未安装,打印提示信息
            app_logger.info("smartctl 未安装,正在尝试安装...")
            try:
                # 构造安装 smartmontools 包的命令,使用 echo 命令将密码传递给 sudo 命令
                # 先更新软件包列表,然后安装 smartmontools 包
                install_command = f'echo {self.password} | sudo -S apt update && echo {self.password} | sudo -S apt install -y smartmontools'
                # 执行安装命令,并捕获命令的输出和返回码
                result = subprocess.run(install_command, shell=True, capture_output=True, text=True)
                if result.returncode == 0:
                    # 如果命令执行成功,打印安装成功的信息,并返回 True
                    app_logger.info("smartctl 安装成功。")
                    return True
                else:
                    # 如果命令执行失败,打印安装失败的信息,并返回 False
                    app_logger.error(f"smartctl 安装失败: {result.stderr}")
                    return False
            except Exception as e:
                # 捕获安装过程中可能出现的异常,打印异常信息,并返回 False
                app_logger.error(f"安装过程中发生错误: {e}")
                return False
        # 如果 smartctl 命令已安装,直接返回 True
        return True

    def get_all_disks(self):
        try:
            # 执行 lsblk 命令,获取所有硬盘设备的信息
            # -dnlo 选项分别表示不显示子设备、不显示标题、只输出指定列
            # name,type 表示只输出设备名称和设备类型
            result = subprocess.run(['lsblk', '-dnlo', 'name,type'], capture_output=True, text=True)
            if result.returncode == 0:
                # 如果命令执行成功,将输出按行分割成列表
                lines = result.stdout.strip().splitlines()
                # 初始化一个空列表,用于存储所有硬盘设备的路径
                disks = []
                for line in lines:
                    # 对每一行输出进行分割,得到设备名称和设备类型
                    parts = line.split()
                    if len(parts) == 2 and parts[1] == 'disk':
                        # 如果分割后的部分长度为 2 且设备类型为 disk
                        # 将设备名称添加到 /dev/ 前缀后,添加到 disks 列表中
                        disks.append(f'/dev/{parts[0]}')
                # 返回包含所有硬盘设备路径的列表
                return disks
            else:
                # 如果命令执行失败,打印获取硬盘设备列表失败的信息,并输出错误信息
                app_logger.error(f"获取硬盘设备列表失败: {result.stderr}")
        except Exception as e:
            # 捕获执行过程中可能出现的异常,打印异常信息
            app_logger.error(f"发生错误: {e}")
        # 如果出现异常或命令执行失败,返回空列表
        return []

    def get_hard_disk_temperature(self, device):
        # 检查 smartctl 命令是否安装,如果未安装则尝试安装
        if not self.check_smartctl_installed():
            # 如果安装失败,打印提示信息,并返回 None
            app_logger.error("无法安装 smartctl,请手动安装 smartmontools。")
            return None
        try:
            # 执行 smartctl 命令,获取指定硬盘设备的详细信息
            # -S 选项用于指定输入密码的方式,-a 选项表示显示所有信息
            process = subprocess.Popen(['sudo', '-S', 'smartctl', '-a', device], stdin=subprocess.PIPE, stdout=subprocess.PIPE, stderr=subprocess.PIPE, text=True)
            # 向进程的标准输入传递密码,并获取命令的输出和错误信息
            stdout, stderr = process.communicate(input=self.password + '\n')
            if process.returncode == 0:
                # 如果命令执行成功,将输出按行分割成列表
                lines = stdout.splitlines()
                for line in lines:
                    # 遍历每一行输出,查找包含 Temperature_Celsius 的行
                    if "Temperature_Celsius" in line:
                        # 对包含 Temperature_Celsius 的行进行分割
                        parts = line.split()
                        # 尝试从分割后的列表中提取温度值,温度值通常在第 10 个位置
                        temperature = parts[9] if len(parts) > 9 else None
                        if temperature:
                            # 如果成功提取到温度值,返回该温度值
                            return temperature
                # 如果未找到温度信息,打印提示信息
                app_logger.info(f"未找到 {device} 硬盘温度信息。")
            else:
                # 如果命令执行失败,打印查询硬盘温度命令执行失败的信息,并输出错误信息
                app_logger.error(f"查询 {device} 硬盘温度命令执行失败: {stderr}")
        except Exception as e:
            # 捕获执行过程中可能出现的异常,打印异常信息
            app_logger.error(f"查询 {device} 硬盘温度时发生错误: {e}")
        # 如果出现异常或未找到温度信息,返回 None
        return None

    def check_all_disks_temperature(self):
        # 调用 get_all_disks 方法,获取所有硬盘设备的路径
        disks = self.get_all_disks()
        # 初始化一个空字典,用于存储每个硬盘设备的温度信息
        temperature_dict = {}
        for disk in disks:
            # 遍历每个硬盘设备,调用 get_hard_disk_temperature 方法获取其温度
            temperature = self.get_hard_disk_temperature(disk)
            if temperature:
                # 如果成功获取到温度信息,将硬盘设备路径和温度信息添加到字典中
                temperature_dict[disk] = temperature
        return temperature_dict


# 数据库操作类,用于处理与数据库的交互
class DatabaseHandler:
    def __init__(self):
        # 数据库配置信息,包括主机地址、端口、用户名、密码和数据库名
        self.db_config = {
            'host': '101.32.99.XXX',
            'port': 3306,
            'user': 'temp',
            'password': 'wfLYLyexG',
            'database': 'temp'
        }

    def connect_to_db(self):
        try:
            # 尝试连接到数据库
            connection = mysql.connector.connect(**self.db_config)
            # 记录数据库连接成功的信息
            db_logger.info("数据库连接成功")
            return connection
        except mysql.connector.Error as err:
            # 记录数据库连接错误的信息
            db_logger.error(f"数据库连接错误: {err}")
            return None

    def insert_action_record(self, disk, action, temperature):
        # 连接到数据库
        connection = self.connect_to_db()
        if connection:
            # 创建数据库游标,用于执行 SQL 语句
            cursor = connection.cursor()
            try:
                # 获取当前时间戳
                timestamp = time.strftime('%Y-%m-%d %H:%M:%S')
                # 插入操作记录的 SQL 语句
                insert_query = "INSERT INTO action_records (disk, action, temperature, timestamp) VALUES (%s, %s, %s, %s)"
                # 执行 SQL 语句
                cursor.execute(insert_query, (disk, action, temperature, timestamp))
                # 提交事务
                connection.commit()
                # 记录插入操作记录成功的信息
                db_logger.info(f"成功插入操作记录:disk={disk}, action={action}, temperature={temperature}, timestamp={timestamp}")
            except mysql.connector.Error as err:
                # 记录插入操作记录时出错的信息
                db_logger.error(f"插入操作记录时出错: {err}")
            finally:
                # 关闭游标
                cursor.close()
                # 关闭数据库连接
                connection.close()

    def insert_sdb_temperature(self, temperature):
        # 连接到数据库
        connection = self.connect_to_db()
        if connection:
            # 创建数据库游标
            cursor = connection.cursor()
            try:
                # 获取当前时间戳
                timestamp = time.strftime('%Y-%m-%d %H:%M:%S')
                # 插入 sdb 温度记录的 SQL 语句
                insert_query = "INSERT INTO sdb_temperatures (temperature, timestamp) VALUES (%s, %s)"
                # 执行 SQL 语句
                cursor.execute(insert_query, (temperature, timestamp))
                # 提交事务
                connection.commit()
                # 记录插入 sdb 温度记录成功的信息
                db_logger.info(f"成功插入 sdb 温度记录:temperature={temperature}, timestamp={timestamp}")
            except mysql.connector.Error as err:
                # 记录插入 sdb 温度记录时出错的信息
                db_logger.error(f"插入 sdb 温度记录时出错: {err}")
            finally:
                # 关闭游标
                cursor.close()
                # 关闭数据库连接
                connection.close()

    def insert_sdc_temperature(self, temperature):
        # 连接到数据库
        connection = self.connect_to_db()
        if connection:
            # 创建数据库游标
            cursor = connection.cursor()
            try:
                # 获取当前时间戳
                timestamp = time.strftime('%Y-%m-%d %H:%M:%S')
                # 插入 sdc 温度记录的 SQL 语句
                insert_query = "INSERT INTO sdc_temperatures (temperature, timestamp) VALUES (%s, %s)"
                # 执行 SQL 语句
                cursor.execute(insert_query, (temperature, timestamp))
                # 提交事务
                connection.commit()
                # 记录插入 sdc 温度记录成功的信息
                db_logger.info(f"成功插入 sdc 温度记录:temperature={temperature}, timestamp={timestamp}")
            except mysql.connector.Error as err:
                # 记录插入 sdc 温度记录时出错的信息
                db_logger.error(f"插入 sdc 温度记录时出错: {err}")
            finally:
                # 关闭游标
                cursor.close()
                # 关闭数据库连接
                connection.close()

    def insert_logs_to_db(self, log_content):
        # 连接到数据库
        connection = self.connect_to_db()
        if connection:
            # 创建数据库游标
            cursor = connection.cursor()
            try:
                # 正则表达式用于匹配日志行中的时间、应用、级别和内容
                pattern = r'(\d{4}-\d{2}-\d{2} \d{2}:\d{2}:\d{2},\d+) - (\S+) - (\S+) - (.*)'
                for line in log_content.splitlines():
                    # 匹配日志行
                    match = re.match(pattern, line)
                    if match:
                        # 提取时间、应用、级别和内容
                        timestamp, app, level, message = match.groups()
                        # 插入日志记录的 SQL 语句
                        insert_query = "INSERT INTO logs (timestamp, app, level, content) VALUES (%s, %s, %s, %s)"
                        # 执行 SQL 语句
                        cursor.execute(insert_query, (timestamp, app, level, message))
                # 提交事务
                connection.commit()
                # 记录插入日志到数据库成功的信息
                db_logger.info("成功插入日志到数据库")
            except mysql.connector.Error as err:
                # 记录插入日志到数据库时出错的信息
                db_logger.error(f"插入日志到数据库时出错: {err}")
            finally:
                # 关闭游标
                cursor.close()
                # 关闭数据库连接
                connection.close()


def write_logs_to_db():
    # 创建数据库操作对象
    db_handler = DatabaseHandler()
    # 获取当前时间
    now = datetime.now()
    # 获取昨天的日期
    yesterday = now - timedelta(days=1)
    # 生成昨天的日志文件名
    log_file_name = f'app.log.{yesterday.strftime("%Y-%m-%d")}'
    # 生成日志文件的完整路径
    log_file_path = os.path.join(log_folder, log_file_name)
    if os.path.exists(log_file_path):
        try:
            # 打开日志文件并读取内容
            with open(log_file_path, 'r') as f:
                log_content = f.read()
            # 将日志内容插入到数据库中
            db_handler.insert_logs_to_db(log_content)
            # 删除日志文件
            os.remove(log_file_path)
            # 记录日志写入数据库并删除文件的信息
            app_logger.info(f"已将 {log_file_name} 日志写入数据库并删除文件")
        except Exception as e:
            # 记录写入日志到数据库时出错的信息
            app_logger.error(f"写入 {log_file_name} 日志到数据库时出错: {e}")


if __name__ == "__main__":
    # 请替换为你飞牛NAS的实际密码
    password = "password"
    # 创建硬盘温度检查对象
    checker = HardDiskTemperatureChecker(password)

    # 小米设备的 IP 地址。去路由器后台找最方便
    ip = "192.168.100.103"
    # 小米设备的 token
    token = "4e08c31edb7e84fc42d508913240b671"

    # 创建小米设备对象
    device = Device(ip, token, start_id=0, model="lgb.plug.lgbear")

    # 电源开启触发标志
    power_on_triggered = False

    # 创建数据库操作对象
    db_handler = DatabaseHandler()

    # 温度检查间隔时间,单位为秒
    temperature_check_interval = 10

    while True:
        # 获取当前时间
        now = datetime.now()
        # 如果当前时间是上午 9 点
        if now.hour == 9 and now.minute == 0:
            # 将昨天的日志写入数据库
            write_logs_to_db()
        # 检查所有硬盘的温度
        temperature_dict = checker.check_all_disks_temperature()
        if len(temperature_dict) >= 3:
            # 获取 sdb 硬盘的温度
            sdb = int(list(temperature_dict.values())[1])
            # 获取 sdc 硬盘的温度
            sdc = int(list(temperature_dict.values())[2])

            # 插入 sdb 温度记录到数据库
            db_handler.insert_sdb_temperature(sdb)
            # 插入 sdc 温度记录到数据库
            db_handler.insert_sdc_temperature(sdc)

            # 记录 sdb 和 sdc 的温度以及电源开启触发标志
            app_logger.info(f"sdb 温度: {sdb}, sdc 温度: {sdc}, power_on_triggered: {power_on_triggered}")

            if not power_on_triggered:
                if isinstance(sdb, (int, float)) and isinstance(sdc, (int, float)):
                    if sdb >= 38 or sdc >= 38:
                        try:
                            # 发送开启电源的命令
                            power_on = device.send("set_properties", [{'did': 'MYDID', 'siid': 7, 'piid': 1, 'value': True}])
                            # 记录开启电源操作的返回值
                            app_logger.info(f"power_on 操作返回值: {power_on}")
                            if power_on:
                                # 设置电源开启触发标志为 True
                                power_on_triggered = True
                                if sdb >= 38:
                                    # 插入 sdb 开启电源的操作记录到数据库
                                    db_handler.insert_action_record('sdb', 'power_on', sdb)
                                else:
                                    # 插入 sdc 开启电源的操作记录到数据库
                                    db_handler.insert_action_record('sdc', 'power_on', sdc)
                        except Exception as e:
                            # 记录执行开启电源操作时出错的信息
                            app_logger.error(f"执行 power_on 操作时出错: {e}")
                else:
                    # 记录 sdb 或 sdc 不是有效数值类型的信息
                    app_logger.error(f"sdb 或 sdc 不是有效的数值类型,sdb: {sdb}, sdc: {sdc}")
            else:
                if sdb <= 31 and sdc <= 31:
                    try:
                        # 发送关闭电源的命令
                        power_off = device.send("set_properties", [{'did': 'MYDID', 'siid': 7, 'piid': 1, 'value': False}])
                        # 记录关闭电源操作的返回值
                        app_logger.info(f"power_off 操作返回值: {power_off}")
                        if power_off:
                            # 设置电源开启触发标志为 False
                            power_on_triggered = False
                            if sdb <= 31:
                                # 插入 sdb 关闭电源的操作记录到数据库
                                db_handler.insert_action_record('sdb', 'power_off', sdb)
                            if sdc <= 31:
                                # 插入 sdc 关闭电源的操作记录到数据库
                                db_handler.insert_action_record('sdc', 'power_off', sdc)
                    except Exception as e:
                        # 记录执行关闭电源操作时出错的信息
                        app_logger.error(f"执行 power_off 操作时出错: {e}")

        # 暂停指定的时间后再次检查温度
        time.sleep(temperature_check_interval)
—
参考资料
1. 米家设备使用方法
2. Xiaomi Miio – Home Assistant
3. linzhiji的CSND 使用代码控制小米智能插座
4. python-miio
5. python-miio Doc
6. 豆包
7. DeepSeek
8. 米家集成
AI真的YYDS
Okay, so I checked out 7788bet9br following some recommendations from 7788bet4. Pretty solid experience. The layout is clean, and I found some good games right away. Not bad at all! Check it out yourself: 7788bet4
So I downloaded 77winapp from 77winapp.net. It’s actually pretty smooth. Navigating is easy, and hey, I saw a fair selection of games. Give the app a shot: 77winapp
Alright, I had a look at 789bet08 through 789bet08.com. It’s alright. Not amazing, but not terrible either. Worth a quick look if you’re looking for new options: 789bet08
Manalo bet sounds interesting. Ready to take a chance and try my luck there! Fingers crossed!. manalo bet
Just stumbled upon Spintime! Looks promising. Let’s see if I can turn a small deposit into a mountain of cash! Try Spintime: spintime
Xsmb 68, are there some hints and predictions here? Lets check the numbers and cross ourfingers that it’s a winner! Start winning here: xsmb 68
1666betapp. Alright, straight to the point. Easy to use and quick bets are a good start. Hoping for some real action! Explore it on 1666betapp
Just logged into 8betcasinologin, and the games are looking sharp today! I’m hoping to hit a big jackpot. Wish me luck! You can log in and see for yourself right here 8betcasinologin
Trying my hand at bet522bet today. The odds seem pretty good, and the site loads fast. Hopefully, I’ll walk away a winner. Check it out if you want bet522bet.